How I Made My Keyboard OLED Show Live Weather Animations - QMK
So, I recently got a Sofle V2.1 RGB, a beautiful split keyboard with two crisp OLED screens. After the initial excitement of typing on a custom ergo board wore off, I found myself staring at the QMK logo. The default layer indicator is fine, but I wanted something useful and alive.
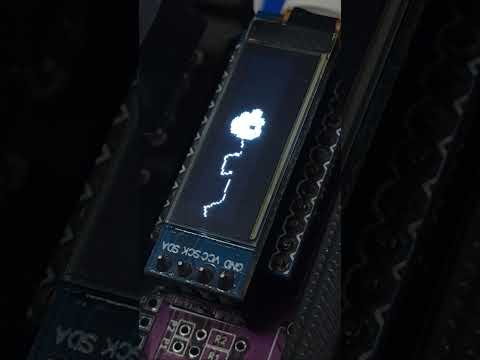
I decided to turn one of the OLEDs into a live weather status display. Now, without touching my phone, I can glance down and see if it's Sunny, Cloudy, or Raining based on a custom animation.
This blog walks you through the exact steps to achieve this. A quick heads-up: This guide assumes you already know how to set up a QMK environment, create a hex file, and flash your keyboard. We're focusing purely on the custom logic.
The Big Picture: How It Works
Before we dive into code, let's understand the pipeline:
- The PC (Node.js Script): A script runs in the background on your computer. Every few minutes, it pings the OpenWeatherMap API to get the current weather condition for your city.
- The Bridge (RAW HID): The script translates "Clear Sky" into a simple number (e.g.,
1for sunny) and sends that single byte over USB to the keyboard using a protocol called RAW HID. - The Keyboard (QMK Firmware): The keyboard's microcontroller receives that number. The firmware then looks up which image to draw on the OLED screen based on that number.
It sounds complex, but it's surprisingly straightforward thanks to QMK's flexibility.
Step 1: The Firmware Foundation (QMK)
First, we need to prep the keyboard to listen for data and know what to draw. We'll create a new file to keep our code organized.
File Setup:
Create a file called weather.c inside your keymap folder (e.g., keyboards/sofle/keymaps/your_name/). We'll include this in our main keymap.c later.
rules.mk Configuration:
Make sure your rules.mk has these lines enabled. This turns on the OLED driver and the RAW HID communication channel.
RAW_ENABLE = yes
OLED_ENABLE = yes
The Firmware Logic (weather.c):
Here is the complete code for the file. I've added comments to explain the "why" behind the critical parts.
// weather.c
#include "quantum.h"

// This defines a custom USB "address" so our PC script can find the keyboard.
#define RAW_USAGE_PAGE 0xFF00
#define RAW_USAGE_ID   0x01

// We only need to send 1 byte (0-255) for the weather code, but standard RAW size is 32.
#define RAW_EPSIZE 32

// A global variable to store the last received weather condition code.
// Default is 0 (Unknown).
static uint8_t weather_code = 0;

// --------------------
// RAW HID RECEIVER
// This function runs automatically when the PC sends data to the keyboard.
// --------------------
#ifdef RAW_ENABLE
void raw_hid_receive(uint8_t *data, uint8_t length) {
    // We only care about the very first byte of the packet.
    weather_code = data[0];
}
#endif

// --------------------
// IMAGE FUNCTIONS (Bitmaps)
// Replace these arrays with your own generated images!
// --------------------
void draw_sunny(void) {
    static const char PROGMEM sunny_img[] = {
        // Paste your 'sunny' byte array generated from an image-to-code tool here.
    };
    oled_write_raw_P(sunny_img, sizeof(sunny_img));
}

void draw_cloudy(void) {
    static const char PROGMEM cloudy_img[] = {
        // Paste your 'cloudy' byte array here.
    };
    oled_write_raw_P(cloudy_img, sizeof(cloudy_img));
}

void draw_rainy(void) {
    static const char PROGMEM rainy_img[] = {
        // Paste your 'rainy' byte array here.
    };
    oled_write_raw_P(rainy_img, sizeof(rainy_img));
}

void draw_snow(void) {
    static const char PROGMEM snow_img[] = {
        // Paste your 'snow' byte array here.
    };
    oled_write_raw_P(snow_img, sizeof(snow_img));
}

void draw_unknown(void) {
    static const char PROGMEM unknown_img[] = {
        // Optional: A fallback image (like a question mark or the keyboard logo).
    };
    oled_write_raw_P(unknown_img, sizeof(unknown_img));
}

// --------------------
// MAPPER: Code -> Image
// --------------------
void draw_weather_image(uint8_t code) {
    switch (code) {
        case 1: draw_sunny(); break;
        case 2: draw_cloudy(); break;
        case 3: draw_rainy(); break;
        case 4: draw_snow(); break;
        default: draw_unknown(); break; // If code is 0 or anything else
    }
}

// --------------------
// OLED TASK
// This is the core QMK function that draws the screen.
// --------------------
#ifdef OLED_ENABLE
bool oled_task_user(void) {
    // Crucial for split keyboards: Only draw on the Master (Left) half.
    // This prevents both OLEDs from trying to draw the same thing and flickering.
    if (!is_keyboard_master()) return false;

    oled_clear(); // Wipe the screen clean before drawing the next frame.

    draw_weather_image(weather_code);

    return false;
}
#endif
Integration Tip: In your main keymap.c, add #include "weather.c" at the top. Important: Ensure you remove any other oled_task_user logic you might have had previously to avoid conflicts.
Step 2: The PC Script (Node.js)
This script is the bridge between the internet and your keyboard. It fetches weather data and sends the result to the firmware over USB.
Requirements: You need Node.js installed and the node-hid package.
npm install node-hid
The Script Logic:
- Find Device: It searches USB devices for one matching your keyboard's Vendor ID, Product ID, and that specific
0xFF00Usage Page we defined in QMK. - Fetch Weather: It calls OpenWeatherMap API (you'll need a free API key).
- Map & Send: Converts "Clouds" ->
2, then sends[0x00, 2]to the keyboard.
// weather-sender.js
const HID = require("node-hid");
const https = require("https");

// Configuration
const VENDOR_ID = 64562; // Replace with your keyboard's VID in decimal (0xFC32)
const PRODUCT_ID = 647; // Replace with your keyboard's PID in decimal (0x0287)
const USAGE_PAGE = 0xff00;
const API_KEY = "3edbac264f1dcf6af61c1c9738624da8"; // Replace with your own OpenWeatherMap API Key!
const CITY = "Hyderabad";

// 1. Connect to Keyboard
const deviceInfo = HID.devices().find(
  (d) =>
    d.vendorId === VENDOR_ID &&
    d.productId === PRODUCT_ID &&
    d.usagePage === USAGE_PAGE,
);

if (!deviceInfo) {
  console.error(
    "Keyboard RAW HID not found. Is it plugged in and flashed with RAW_ENABLE = yes?",
  );
  process.exit(1);
}

const device = new HID.HID(deviceInfo.path);
console.log(`Connected to ${deviceInfo.product}`);

// Helper: Send weather code
function sendWeatherCode(code) {
  // QMK expects a Report ID (usually 0x00) followed by the data.
  device.write([0x00, code]);
}

// 2. Get Weather from API
function getWeather() {
  return new Promise((resolve, reject) => {
    const url = `https://api.openweathermap.org/data/2.5/weather?q=${CITY}&appid=${API_KEY}&units=metric`;

    https
      .get(url, (res) => {
        let data = "";
        res.on("data", (chunk) => (data += chunk));
        res.on("end", () => {
          try {
            const json = JSON.parse(data);
            const condition = json.weather[0].main;

            let code = 0; // Default (Unknown)
            if (condition === "Clear") code = 1;
            else if (condition === "Clouds") code = 2;
            else if (["Rain", "Drizzle", "Thunderstorm"].includes(condition))
              code = 3;
            else if (condition === "Snow") code = 4;

            resolve(code);
          } catch (err) {
            reject(`API Parse Error: ${err.message}`);
          }
        });
      })
      .on("error", reject);
  });
}

// 3. Main Loop: Check weather every 5 minutes
async function updateLoop() {
  try {
    const code = await getWeather();
    sendWeatherCode(code);
    console.log(
      `[${new Date().toLocaleTimeString()}] Weather updated. Sent code: ${code}`,
    );
  } catch (err) {
    console.error("Update failed:", err);
  }

  // Wait 5 minutes (300,000 ms) before checking again
  setTimeout(updateLoop, 300000);
}

// Start!
updateLoop();
Step 3: The Artwork (Bitmaps)
You'll notice the draw_sunny() functions have empty arrays. You need to generate these bitmaps.
- Create Images: Make black and white images exactly the size of your OLED display (for Sofle V1, that's 128x32 pixels).
- Convert to Code: Use a tool like image2cpp . Upload your image, set the canvas size, and crucially: set Code Output Format to
plain bytesorArduino Code. Copy the array of hex numbers. - Paste: Paste that array into the corresponding function in
weather.c.
Why This Matters (The "Why")
Beyond the cool factor, this project is a perfect gateway into the deeper capabilities of QMK. It demystifies:
- USB Communication: You're not just typing letters; you're sending custom data channels.
- Host-Side Integration: Your keyboard isn't an island; it can react to the world outside the USB cable.
- Split Keyboard Logic: Understanding
is_keyboard_master()is key to managing dual OLED setups.
Troubleshooting Common Hiccups
- No HID Device Found: If the Node script can't find the keyboard, double-check the
VENDOR_IDandPRODUCT_ID. You can find yours by running a simpleHID.devices()list in Node or checking the QMK info.json file for your board. Also, unplug and replug the keyboard after flashing the new firmware—Windows sometimes caches the HID descriptor. - OLED Flickering: This usually means both halves are trying to draw to the screen simultaneously. Ensure
if (!is_keyboard_master()) return false;is at the very top of youroled_task_userfunction. - API Key Invalid: You must register for a free API key at OpenWeatherMap.org. The one in the example is a placeholder and likely rate-limited or invalid.
Links & Resources
- Video Inspiration: Check out this excellent walkthrough on QMK OLED it helped me a lot when I first started: QMK OLED Tutorial
- Image to Byte Array Converter: image2cpp
- QMK RAW HID Documentation: QMK Docs: Raw HID
- OpenWeatherMap API: Sign up for a free API key
- GitHub Repository: View Project Source
Now you have a keyboard that not only types well but also helps you decide if you need an umbrella. Happy building!